
March 1, 2023
Incorporating security testing earlier in the process allows for security vulnerabilities to fixed sooner and quicker to help eliminate costly vulnerabilities the can be exploited in production. Today, security testing can be performed throughout the software delivery pipeline. Once an application has been deployed, running a Dynamic Application Security Testing (DAST) scan can help detect if your web application has any exposed vulnerabilities. These tests can spider your website, detect if there are any vulnerabilities (passive mode) or actively send attacks to your website to simulate an attack.
OWASP ZAP is a popular open source client tool used for pen testing and can be included in our pipelines as an automated scan. The new OWASP ZAP Baseline Scan GitHub Action provides a very simple way to test your website from any Linux workflow runner. The action pulls down the latest stable (or optionally weekly) container, executes the baseline test, and then can be configured to create an issue to track the work to fix the vulnerabilities. The ZAP Scanning Report is also attached to run so you can look at additional details.
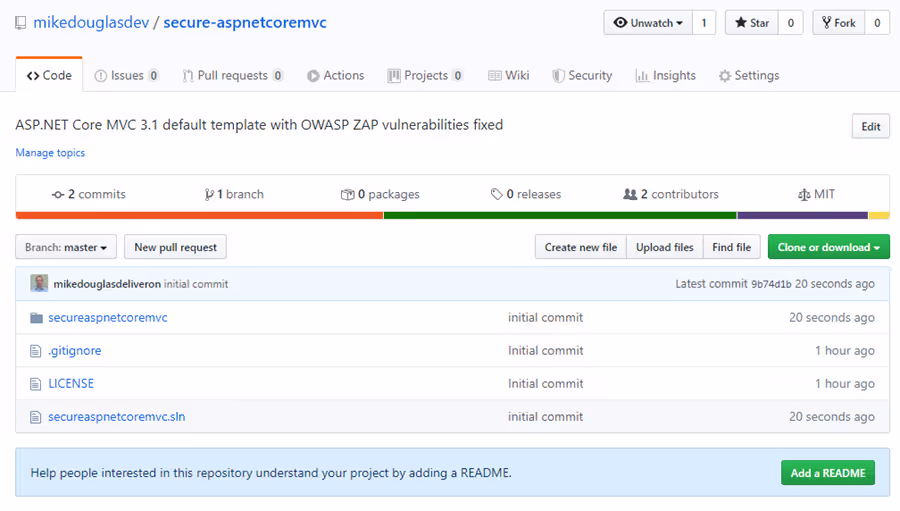
Using the following steps you can include the OWASP ZAP baseline scan in your GitHub repo's workflow. In this example, I am starting with the with a project using the ASP.NET Core MVC 3.1 default template in Visual Studio 2019 16.5.4. Your scan results might vary if you are using a different version or platform but all of the steps still apply.
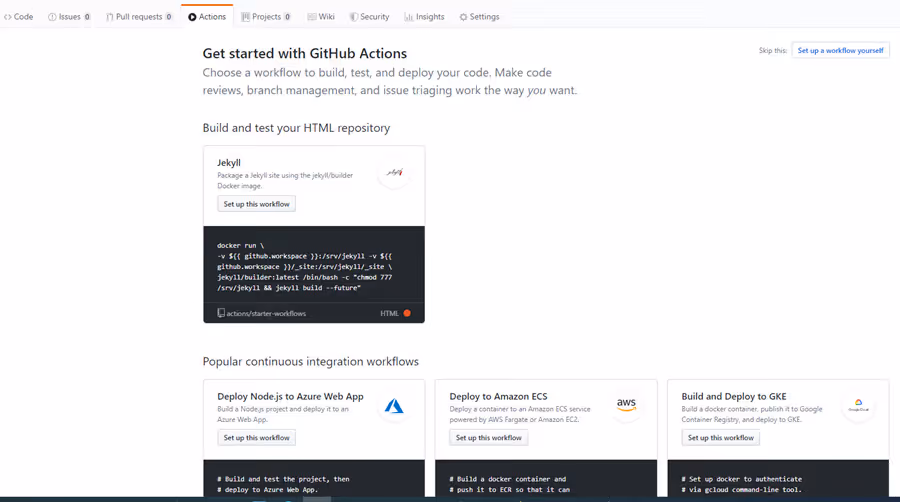
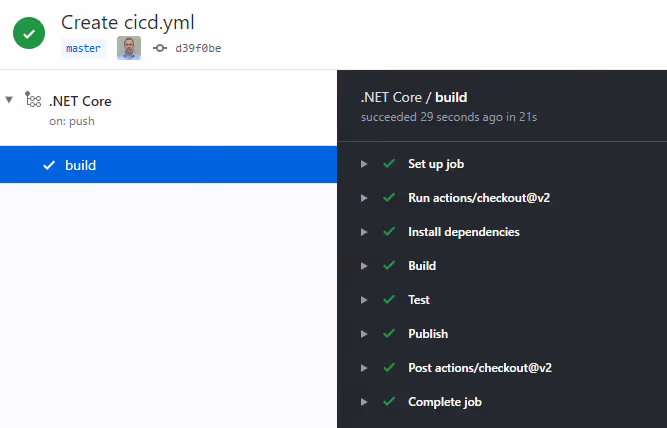
GitHub Actions provide a way to automate your development workflow including CI/CD. Here we will create a default workflow to build the .NET Core application. Click on the Actions tab to bring up the Workflow page.
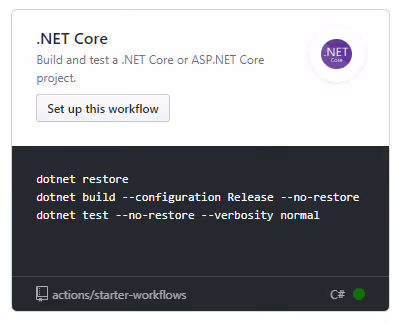
Expand the more workflows to find the .NET Core option. Click the Set up this workflow option to create a starter workflow script
This will compile your application. I renamed it to CICD because we are going to deploy it Azure and run the OWASP ZAP scanner against it.
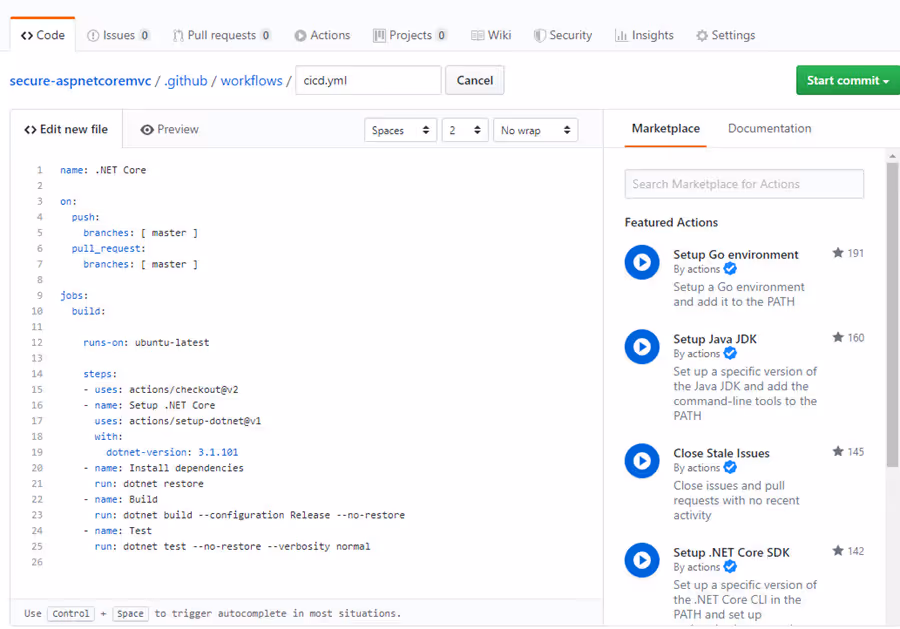
Commit the file and it should trigger the build process. This will ensure that the build succeeds before adding the deploying and scanning actions.
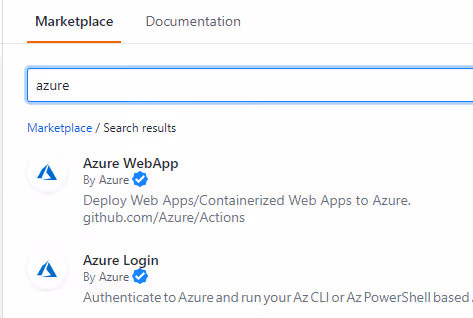
Add the Azure Actions to deploy the application to a preconfigured Azure App Service. Edit the workflow file again. This will display the Marketplace actions. Type Azure into the search and the Azure Web App and Azure Login actions should appear.
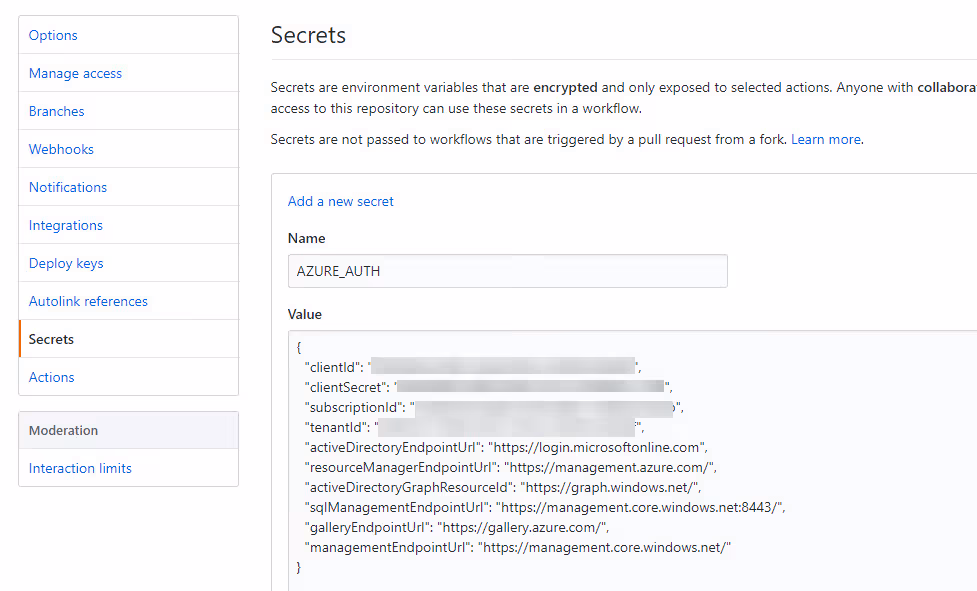
Add Azure Login by clicking on the title and then copying the snippet into the YML file. Most examples use publish profile but I prefer using service principal. Either option requires that the publish profile or the service principal information be stored as a secret for your repo. Right click on Settings and open it in a new browser tab. Use the Azure CLI to create the service principal. You can either do it locally or through the Cloud Shell. Replace the subscription ID with your subscription and run this command to generate the credentials.
az ad sp create-for-rbac --name "github_actions" --role contributor --scopes /subscriptions/11111111-0000-1111-0000-111111111111 --sdk-auth
Copy the full JSON output into the secret and give it a name like AZURE_AUTH.
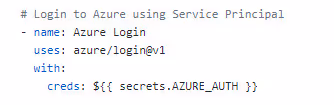
Return to the workflow editor. Add the newly created secret as ${{ secrets.AZURE_AUTH }}
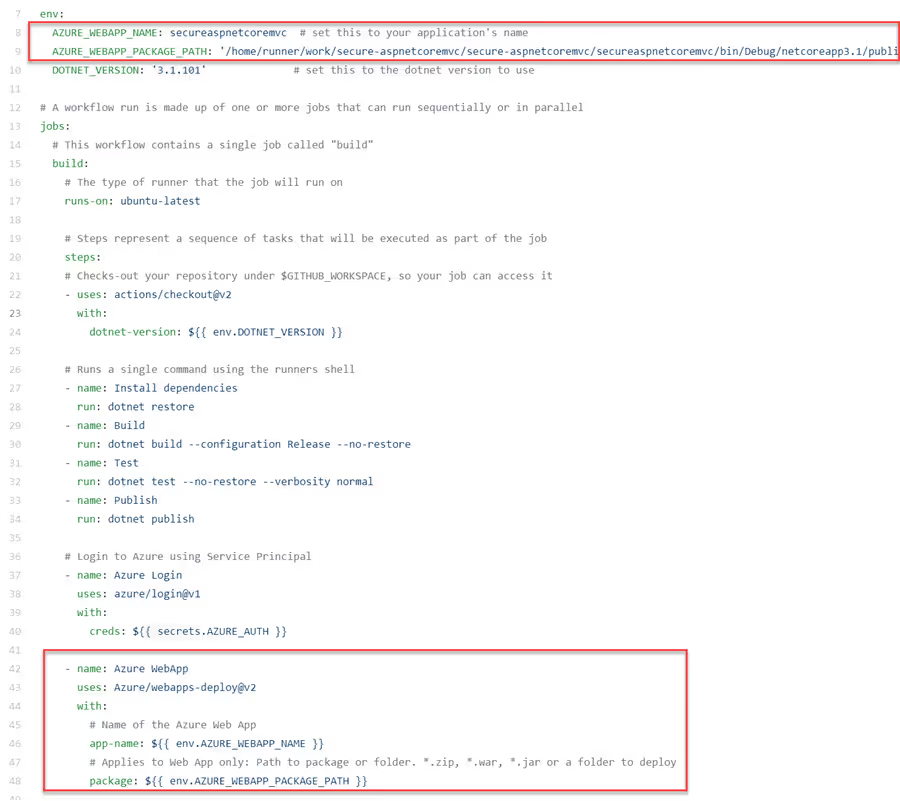
Navigate back in the search results to copy the snippet for the Azure Web App. Most of this snippet will be removed because we are not using that. Add the app name and the package location. Both values were created as environment variables.
At this point, your CICD workflow will build and deploy your web application to the Azure Web App. You can access your site via https://yoursite.azurewebsites.net to verify that it was deployed. The last step is to add the ZAP Scanner. Before adding this action to your workflow, first we need to create a GitHub Token with permission to create an issue with the security vulnerabilities to fix. Your scope might need to be changed if your repo is a private repo.
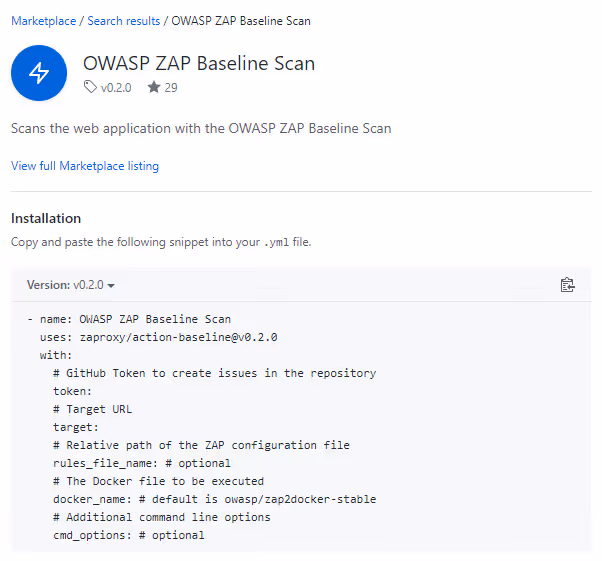
Edit the workflow file again. This time search for the OWASP and select the OWASP ZAP Baseline Scan action. Copy the snippet to add to the workflow.
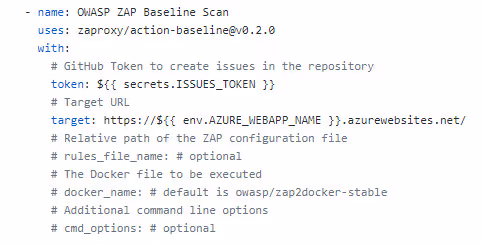
Add the token secret and the target website. You can comment out the other lines with a #.
There are a few other updates I made to the script. You can see the latest version here. Save the workflow and that will trigger the workflow and you should see that it runs the scan and fails the build because it finds 8 warnings.
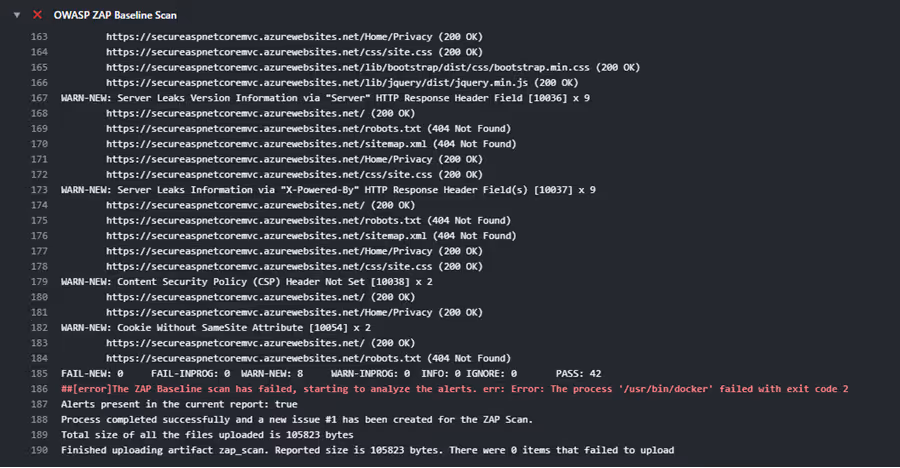
The workflow failed because it found one or more alerts. An Issue was created to create actionable and traceable work for fixing the alerts.
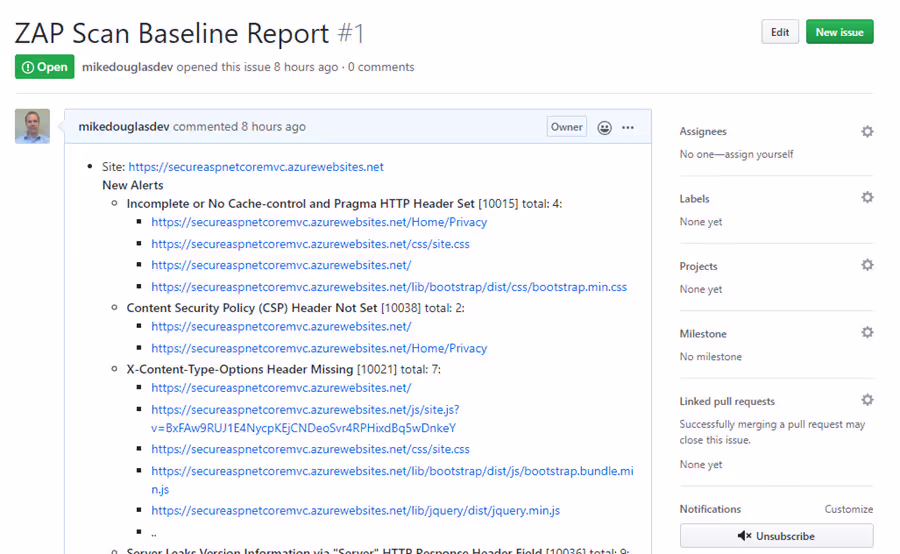
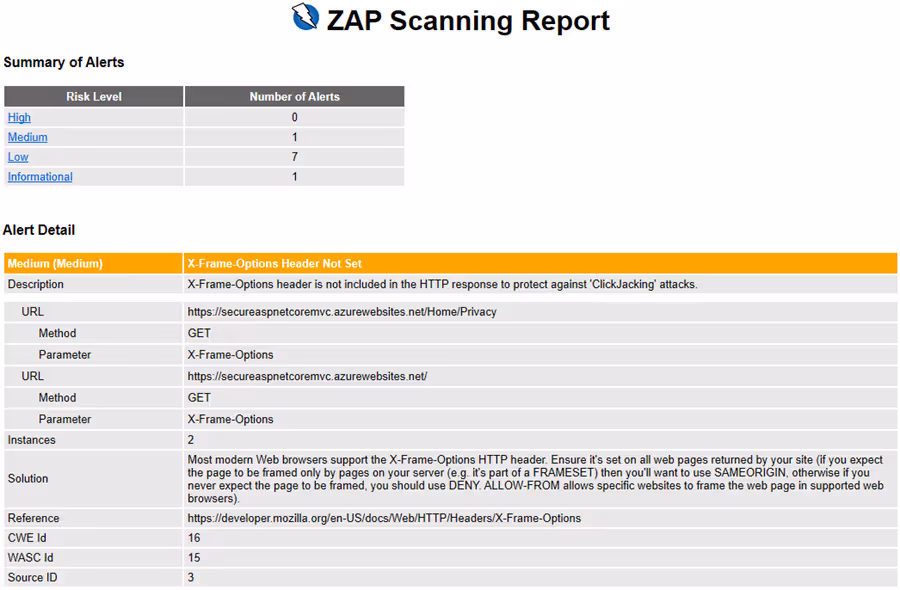
The full OWASP ZAP Scan report is also attached as an artifact to the workflow run. The report contains additional information about the alerts.
At this point, you built, deployed, and performed a baseline DAST scan against the deployed application. The alerts must be fixed or ignored to get the workflow passing. In the next post, I will show how to fix the alerts.

We're here to help you tackle what's next in your digital journey.


